I’ve been looking at WebAR and VR for a while now, testing out a few frameworks when I have the opportunity. The default choice for a long time was Aframe for WebVR and using Jerome Etienne’s AR adaption of that as well.
Recently Apple have stepped up the game with ARKit and the usdz file format which is really exciting. Sure, it only works in Safari using iOS12 in later versions of the iPhone, but it’s baked into the OS and can be quick to get to some solutions (can be quick, I’ve run into a number of problems along the way).
Getting Started ARKit on the Web
You can get started with a pretty comprehensive tutorial from App Coda and the Quick Look Framework. It looks closely at ARKit and at the Quick Look framework that helps power the capabilities it offers. The file format that is used for AR is the usdz file format which is an open format developed by Apple and Pixar (which I’m pretty sure Apple owns). The file format is essentially a Zip file with a different extension and some pretty cool capabilities, but some of my problems came about from getting these images going.
Let’s take a look first at how we can create a usdz file.
Finding or Buying a 3D Obeject (or .obj file)
The first thing that you need is a 3d model that you want to show. I’ve used two sites for this so far, but there’s bound to be hundreds of places you can get 3D models. If you have something that you prefer to use please let me know on Twitter or add a comment below.
CGTrader (I bought the Iron Giant to build something)
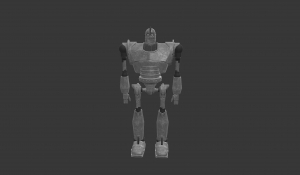
Free 3D (this is where I grabbed the first robot)
I don’t have any affiliations with either of these places. I found that CG Trader had a great community who were quick to answer any questions you had about the files and help you troubleshoot issues you were having. The cost for models on CG Trader ranges a bit, I spent £15 on the first Iron Giant (which didn’t end up working but I’m still trying to define why that might not of worked still) and then £2.50 on the next one which I think worked great.
You could also create your own 3D object I’m sure, but that’s outside the realm of this tutorial and my own wheelhouse.
Creating a usdz file from an .obj
Now that you have your .obj file you can put that on your file system, somewhere that is easy to navigate to through the command line. For me, I left them in the Downloads folder that they downloaded to, but I can be lazy like that. I’d move them somewhere that you’re unlikely to delete when your computer hard drive gets full.
You should be running Mac OSX 10.14 (Mojave)
You need to download and install the latest version of Xcode(10.1), try https://developer.apple.com/download/more/. You should be able to see it in Xcode, Preferences, Location
Open up the Terminal window (I use iTerm, but you can use Terminal)
Navigate to where you’ve downloaded your files, for me ~/justincavery/Downloads/IronGiant/
Within the directory run xcrun usdz_converter name-of-obj-file.obj name-of-usdz-file.usdz
This will create a USDZ file within that folder, and you can press the spacebar to use the Quick Preview viewer to see the output of the file.
If you see a string of error messages in the terminal window after you run the xcrun command… I don’t know how to help you.
What I can tell you however is that I get a lot of error messages when I start trying to do more of the advanced commands when incorporating different arguments for adding color/roughness/metallic maps which I go through below. I find the error messages appear when the file I’m associating with an extra argument isn’t correct, but I have no other knowledge of fixing it other than copying key parts of the error message and searching for them on Duck Duck Go.
I’m going to pretend that this worked flawlessly and you’re ready to upload the resulting file onto your website. If you’re not entirely happy with the output, i.e. it’s missing colour or texture then we cover that further down.
usdz model doesn’t have colour/texture
Bummer.
I think it’s very cool that we can get an augmented model ready to be viewed but it is much nicer when it is a little bit more colourful than the grey you might be seeing at the moment.
.OBJ files usually have a companion .mtl file (the material for the model) however this isn’t of any help to us. I’m still working on steps on how to transfer .mtl files or .tga files into something more usable, but for now you want to try and find models that also contain a texture file.
Texture files are usually included in a textures.rar file so you will need to unpack that to access the individual files. These are mostly .png files which will be quite large, so try and run them through an optimiser like Squoosh.
You will find that the PNG files will often have transparent elements so you can’t convert them back to JPG to save on space, and unfortunately at the moment this won’t support WebP images.
Fortunately the command that we looked at earlier to convert .obj files to .usdz files takes a few additional options. You can find these by running the following command…
xcrun usdz_converter -h
That command gives you these options
usdz_converter
Version: 1.008
2018-11-13 22:52:56.287 usdz_converter[67015:2803738]
USAGE:
<inFilePath> <outFilePath> [options…]
Options:
-g groupName [groupNames …] Apply subsequent material properties to the named group(s).
-m materialName [materialNames …] Apply subsequent material properties to the named material(s).
-h Display help.
-a Generate a .usda intermediate file. Default is .usdc.
-l Leave the intermediate .usd file in the source folder.
-v Verbose output.
-f filePath Read commands from a file.
-texCoordSet set The name of the texturemap coordinate set to use if multiple exist (no quotes).
-opacity o Floating point value 0.0 … 1.0
-color_map filePath
-normal_map filePath
-emissive_map filePath
-metallic_map filePath
-roughness_map filePath
-ao_map filePath
-color_default r g b a Floating point values 0.0 … 1.0
-normal_default r g b a
-emissive_default r g b a
-metallic_default r g b a
-roughness_default r g b a
-ao_default r g b a
As you can see there are a number of options for type-of_map which allows you to put these textures on the element. The creator of the 3D object has hopefully named the maps to correspond, but often you will only need a single map (the color_map).
You can add this to your conversion script like so…
xcrun usdz_converter IronGIant_tosend.obj irongiant_color.usdz -color_map IronGiant_color.png -roughness_map IronGiant_roughness.png
Getting you WebAR USDZ image onto your site
The thing that I really like about the ARKit approach to the WebAR is that it takes a lot of the decision making and heavy lifting out of the situation.
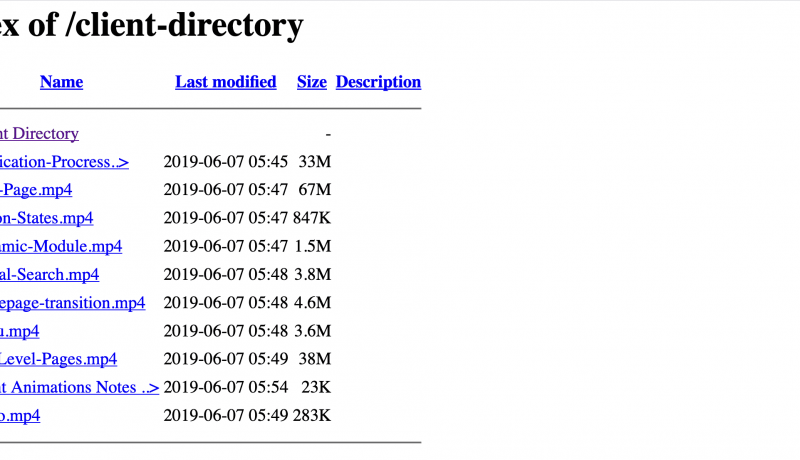
Once you have the USDZ file created using the steps above, you can upload the usdz file onto your server in which ever approach that you usually use. For me, I use CODA2 to FTP the file up to my web server.
With the usdz file on the server, you now need to link to it through your webpage. This involves a regular link with a rel value.
<a href=”/irongiant_color.usdz” rel=”ar” title=”Iron Giant AR”>View my Iron Giant AR Bot</a>
usdz file link only asks me to download
This was such a pain!
I’d followed the tutorials and made sure that I had rel=”ar” in the anchor tag, but it still wanted to download the file instead of using Quick View to view it and allow for the key part…. Augmenting it!
The issue was familiar though. Over the years I’ve tried a number of “new” technologies on the web and found that sometimes they’re not being recognised for what they are. This usually turns out to be a problem with the MIME Type that the server is delivering the file.
There is probably better options to achieve this, like updating my server configuration, but I know that I can use a .htaccess to get this sorted without having to get into configuring the server.
If you create the .htaccess file, or if you update your server settings, this is what you need to add
AddType model/vnd.pixar.usd usdz # All files ending in .usdz served as USD.
With that in place, I was finally able to see the result at https://vr.simplethin.gs/ar/arkit-bot.
I decided to drop my little robot onto Tottenham Court Road

 A notebook you'll actually carry every day.